Making Adjustments in Full Screen View
Full Screen view displays your images with a minimum of distractions on a solid
background and can be used with one or two displays.
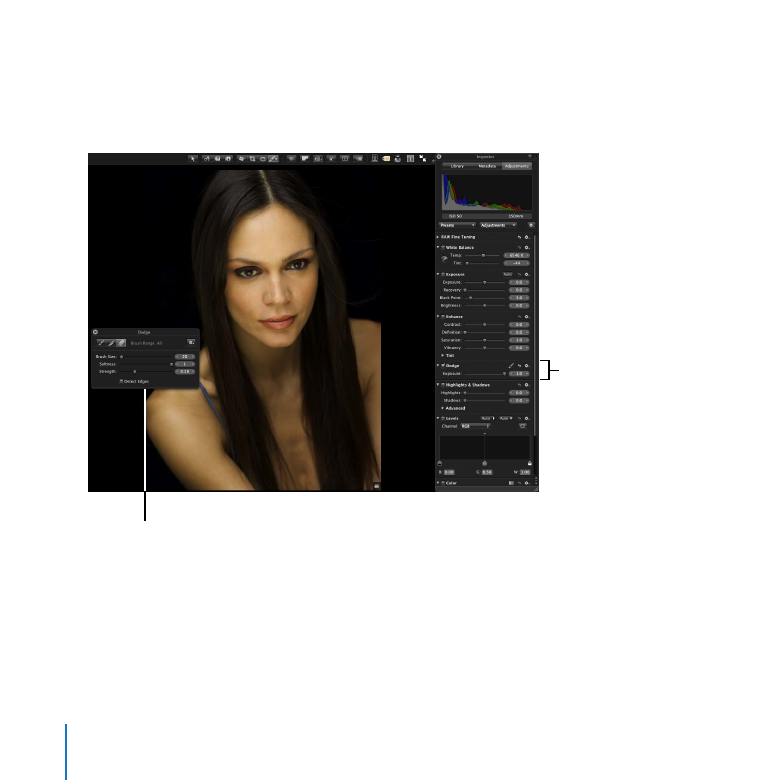
Full Screen view is ideal for making changes and adjustments using Aperture heads-up
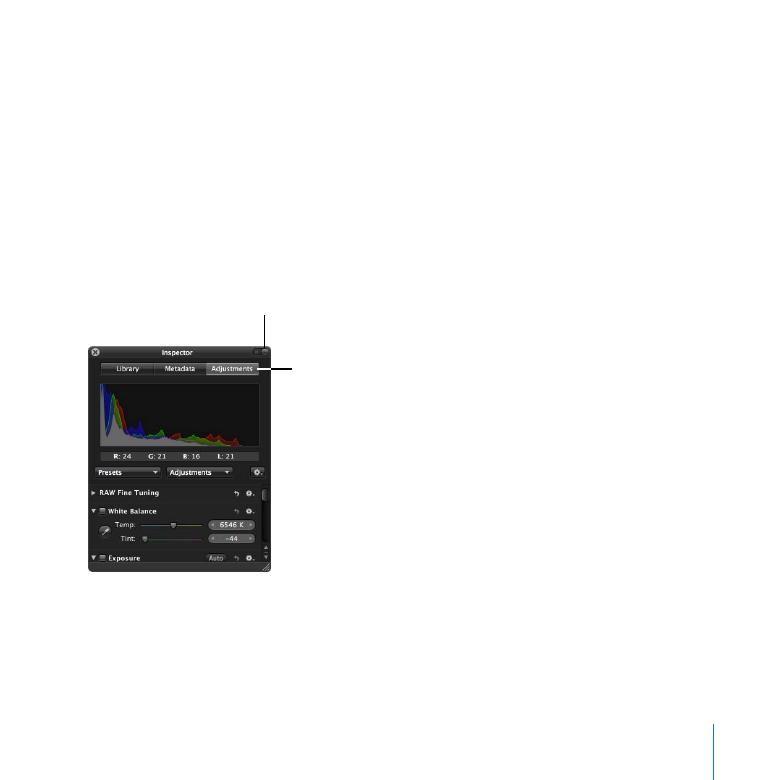
displays (HUDs). One of the main HUDs used in Aperture is the Inspector HUD. In this
section, you’ll use the Adjustments pane of the Inspector HUD to change exposure.
(The Adjustments pane of the Inspector HUD contains the same controls as the
Adjustments inspector in the Inspector pane.)
Adjustments button
Always Show
Inspector HUD control

100
Chapter 6
Exploring Adjustments
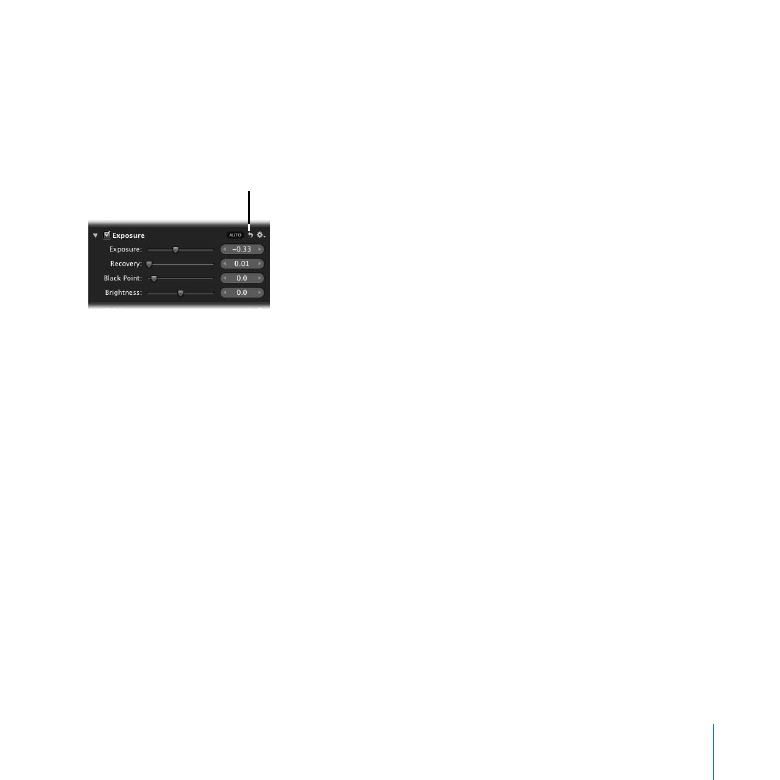
You use the Exposure adjustment controls to set exposure, recover highlight details,
and adjust the blacks of images in shadow. You can also correct the exposure of images
shot in difficult lighting conditions. Feel free to make any adjustments you like to the
sample images; you can always simply turn off or remove the adjustments later.
Thoroughly teaching the use of Aperture adjustments is beyond the scope of this short
guide. For now, just experiment with adjustment options, knowing you can learn the
details later.
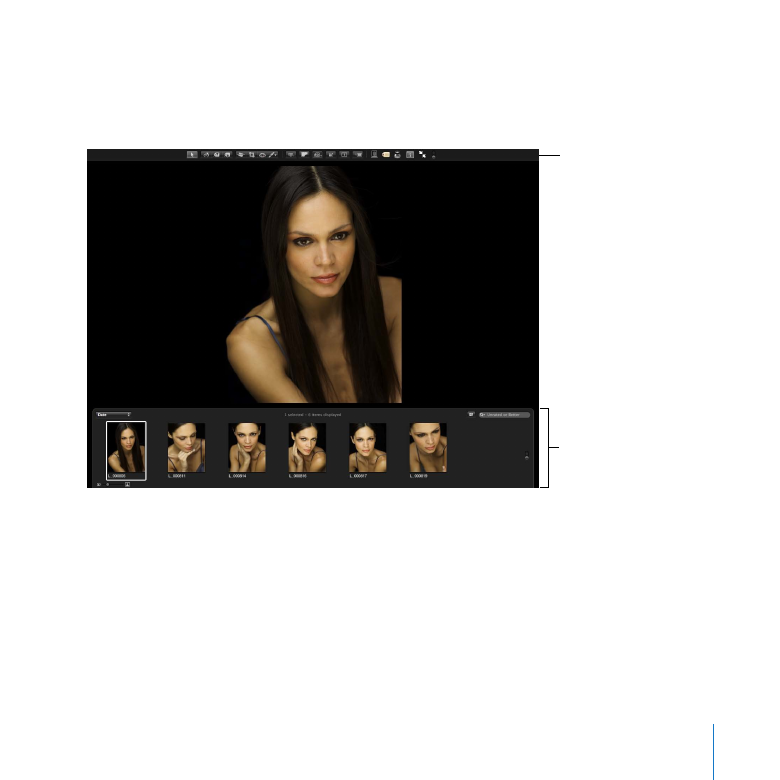
Next, you’ll view images in Full Screen view and use the filmstrip, the toolbar tools, and
the Adjustments pane of the Inspector HUD to adjust an image.
Getting Ready
Click the Library tab to display the Library inspector.
1
In the Library inspector, select the Ivana album in the Portrait Session project in the
2
Studio folder.
Press F to switch to Full Screen view.
3
You can enter or exit Full Screen view by pressing F.
Chapter 6
Exploring Adjustments
101
Use the illustration below to locate the items you want to use. Position the pointer at
the top of the screen to display the toolbar. Position the pointer at the bottom of the
screen to display the filmstrip.
Filmstrip
Toolbar

102
Chapter 6
Exploring Adjustments
Try This
Use the filmstrip to display images
Click an image in the filmstrip. (Position the pointer at the bottom of the screen to
1
display the filmstrip, if it isn’t shown.)
Press the Left Arrow and Right Arrow keys to select different images.
2
Select the first photo of Ivana to make adjustments to it.
3
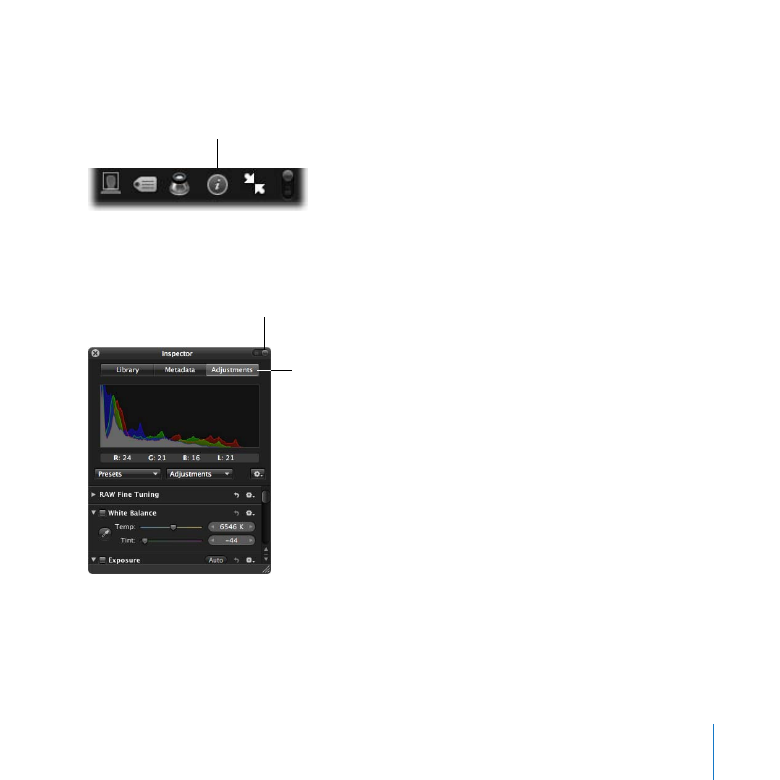
Display the toolbar
Position the pointer at the top of the screen until the toolbar appears. Click the Always
m
Show Toolbar control to keep the toolbar on the screen.
Always Show Toolbar
control
Chapter 6
Exploring Adjustments
103
Display the Inspector HUD in Full Screen view
Click the Inspector HUD button in the toolbar to show the Inspector HUD.
1
Inspector HUD button
Click the Adjustments button at the top of the Inspector HUD to show the
2
Adjustments pane.
Adjustments button
Always Show
Inspector HUD control
Click the Always Show Inspector HUD control to position the HUD where you can easily
3
select and change options while viewing their effect on an image.
104
Chapter 6
Exploring Adjustments
Change an image with the Exposure adjustment
Click the disclosure triangle for the Exposure adjustment to display the Exposure
1
adjustment controls, if necessary.
In the Exposure adjustment area, drag the Exposure slider left or right to set an
2
exposure level that you like, or click a location along the slider control to move the
slider to that point.
You can also click the left arrow or right arrow in the Exposure value slider to change
the exposure of the image by 5 percent of an f-stop, or drag in the value field.
Exposure slider
Exposure value slider
Drag the Brightness slider to adjust the image’s brightness, if necessary.
3
Drag the Black Point slider to change the look of details in the shadows.
4
Chapter 6
Exploring Adjustments
105
Turn the Exposure adjustment on or off
Select or deselect the Exposure checkbox to view the cumulative effect of the Exposure
m
adjustment on your image.
To reset the Exposure adjustment to its default settings, click the Reset button.
m
Reset button
106
Chapter 6
Exploring Adjustments