Working with Places View
In Places view, the locations where your images were shot are represented by pins
on a map.
Chapter 5
Exploring Places
81
Getting Ready
In the Library inspector, select the Canadian Road Trip project in the Travel folder.
m
Try This
View the location of an image or group of images
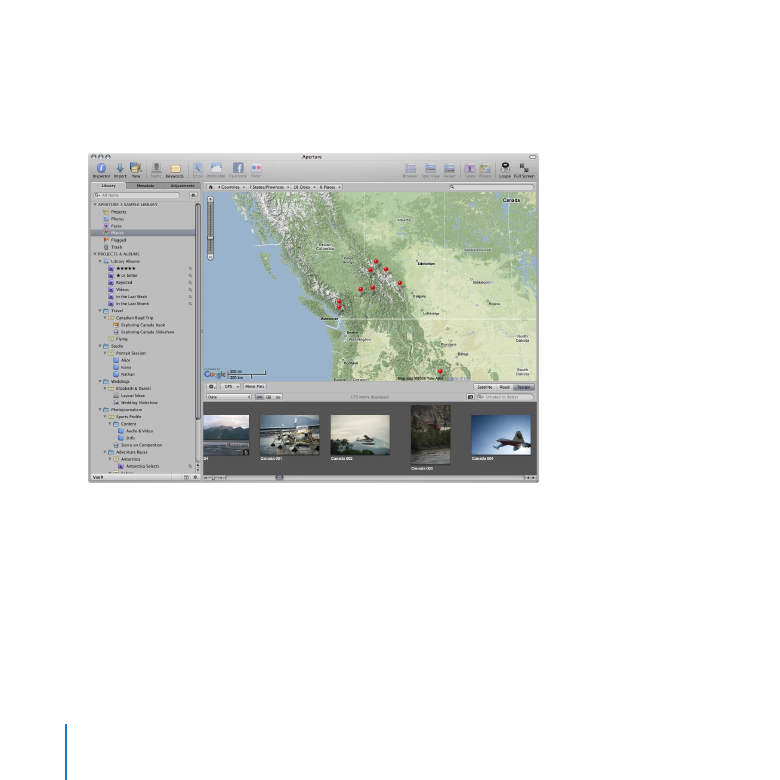
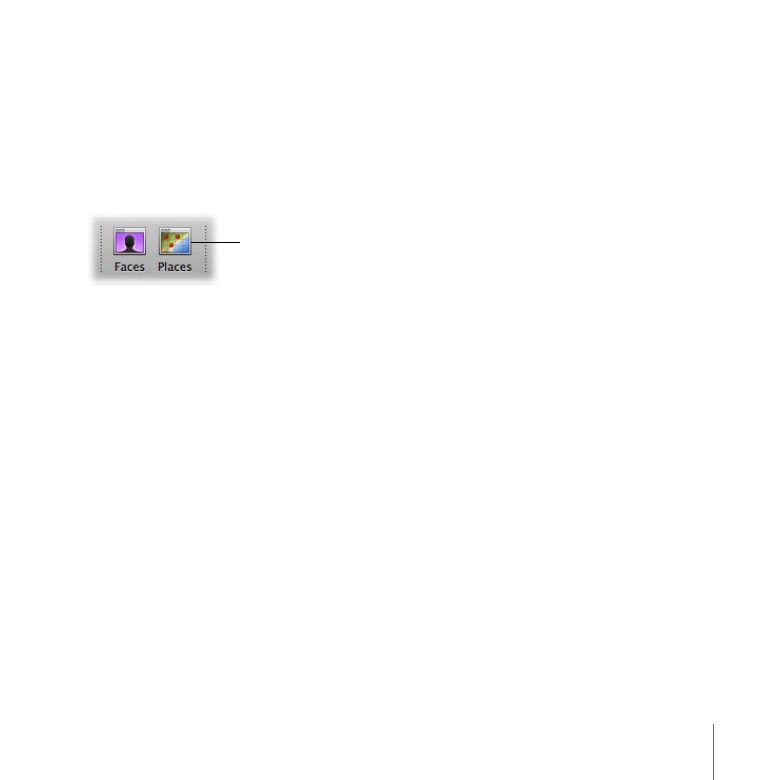
Click the Places button in the toolbar.
1
Places button
The Places view map appears above the Browser. Red pins mark the locations where
images or groups of images were shot.
In the Browser, select the first image, if it’s not already selected.
2
82
Chapter 5
Exploring Places
A location label appears above the red pin that marks the location where the image
was shot.
Location label
Chapter 5
Exploring Places
83
View the images to which a particular location is assigned
In Places view, select a red pin on the map.
m
The image or images associated with the location marked by the pin are selected in
the Browser.
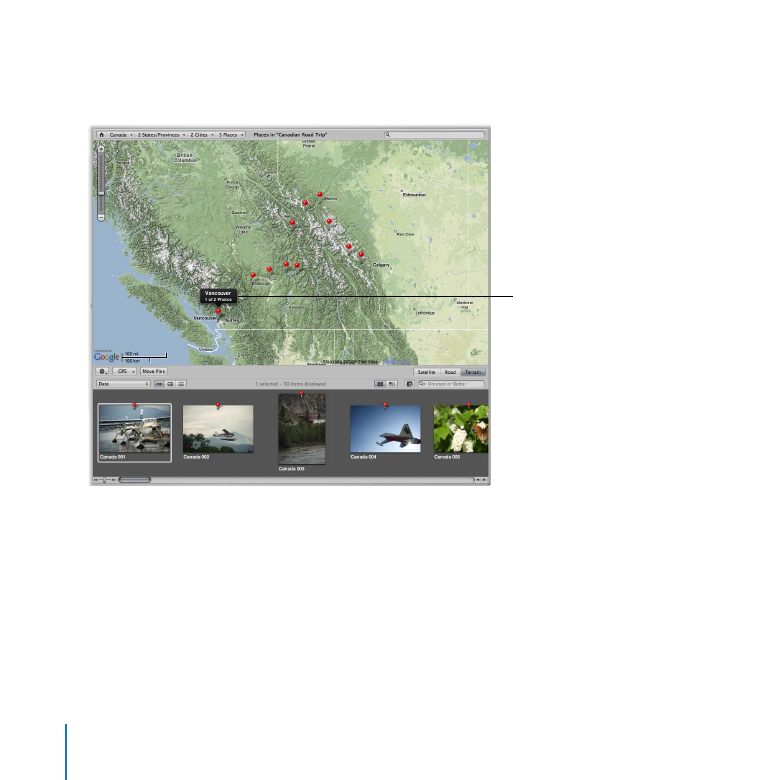
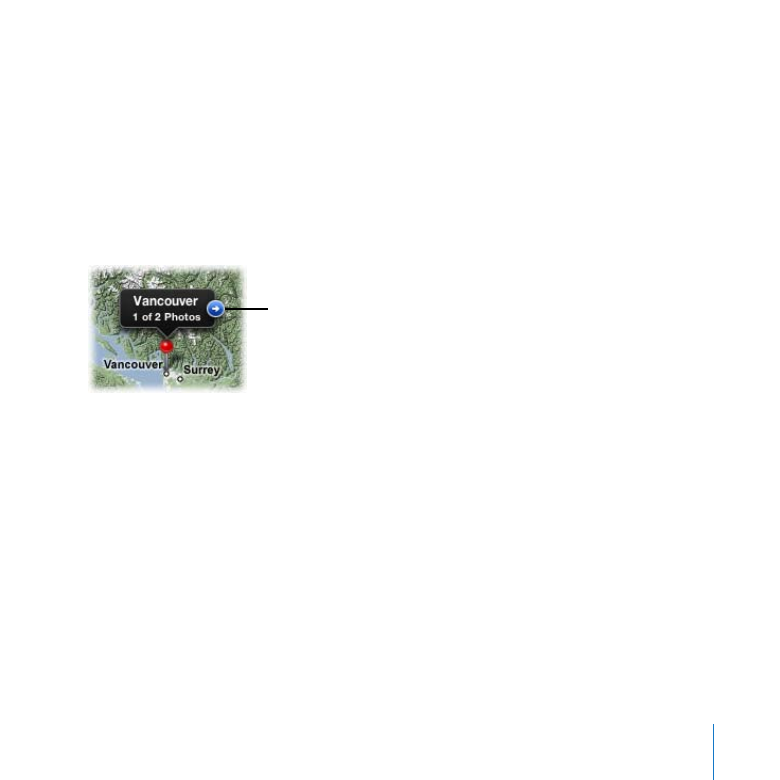
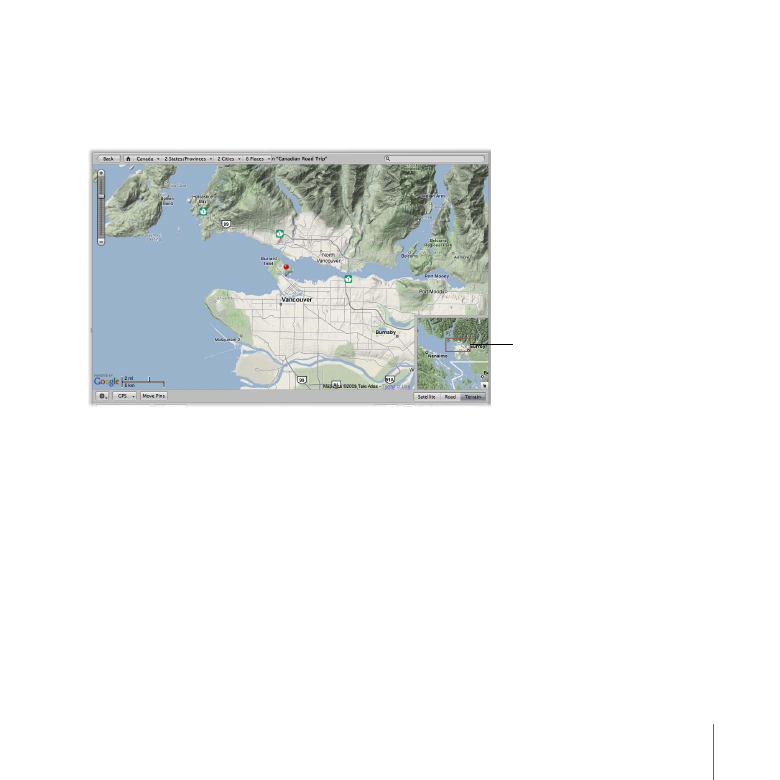
View the precise location of images grouped together in the same location pin
In Places view, click a pin whose location label shows that multiple images are
m
associated with that location, then click the location arrow that appears.
Location arrow
Places view zooms in to the area of the image group, marking the location of each
image with a pin.
Reposition the map in Places view
Drag the map to reposition it.
m

84
Chapter 5
Exploring Places
Change the zoom level of the map in Places view
Double-click the map to zoom in one level.
m
Drag the Zoom slider in the upper-left corner of the map to zoom in to or out of the map.
m
Holding down Command, drag a box over the area you want to zoom in to.
m
Change map views within Places view
Click the Satellite button to show aerial imagery of the map. Select the Show Labels
m
checkbox, which appears when the Satellite button is clicked, to show street names
and other information.
Click the Road button to show the map with a traditional depiction of roads, parks,
m
borders, bodies of water, and more.
Click the Terrain button to show a topographical map with physical elevations as
m
shaded relief along with elevation lines.
Chapter 5
Exploring Places
85
Navigate within the map when it is zoomed in
Increase the zoom level until the Overview Map pane appears in the lower-right corner
1
of the map. A red rectangle inside the Overview Map pane marks the current view.
Drag the red rectangle to
reposition the map view.
To reposition the view, drag the red rectangle so that it is positioned over the area you
2
want to view.
86
Chapter 5
Exploring Places
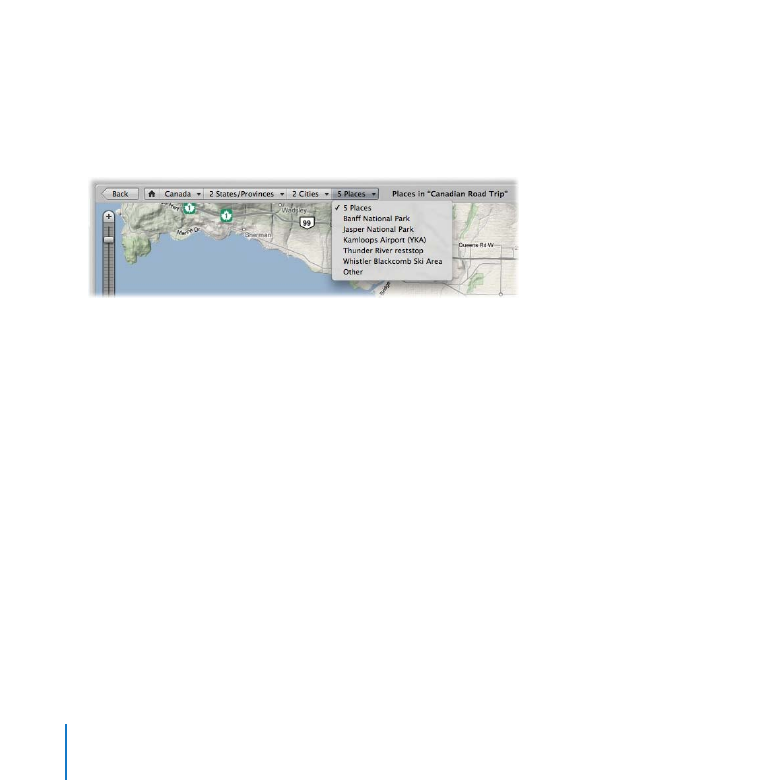
Quickly view a location using the Places Path Navigator
Position the pointer over the Places Path Navigator and click the 5 Places pop-up menu
1
to see its options.
This pop-up menu lists locations on the map that have been assigned to images.
Click the Home button (with a house icon) to reset the map to the default view, then
2
Choose Banff National Park from the 5 Places pop-up menu to see the pin locations of
images that were shot in Banff National Park.
Choose other locations from the Places Path Navigator to familiarize yourself with how
3
this navigator works.
Click the Home button in the Places Path Navigator to reset the map to the default view.
4
Chapter 5
Exploring Places
87
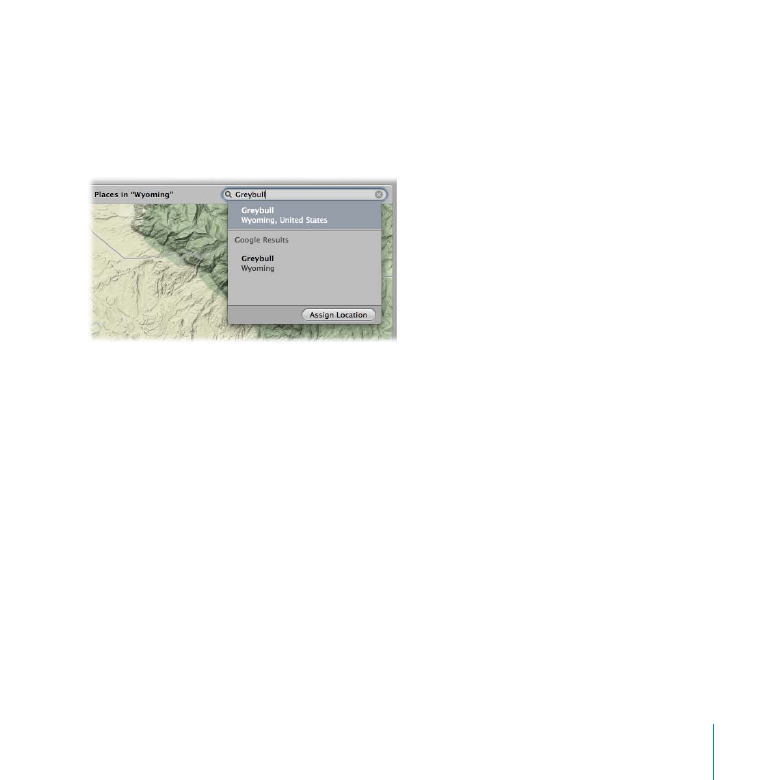
Quickly search for a location and assign it to an image
Select the image or images to which you want to assign a location. For now, select the
1
Wyoming 032 image, an image of horses, in the Wyoming project in the Wildlife folder.
Enter a location in the Places view search field. Enter “Greybull.”
2
Select the Greybull, Wyoming location from the Google Results list.
3
Click Assign Location.
4
A location label appears above a pin, marking the location you assigned to the
selected image.

88
Chapter 5
Exploring Places
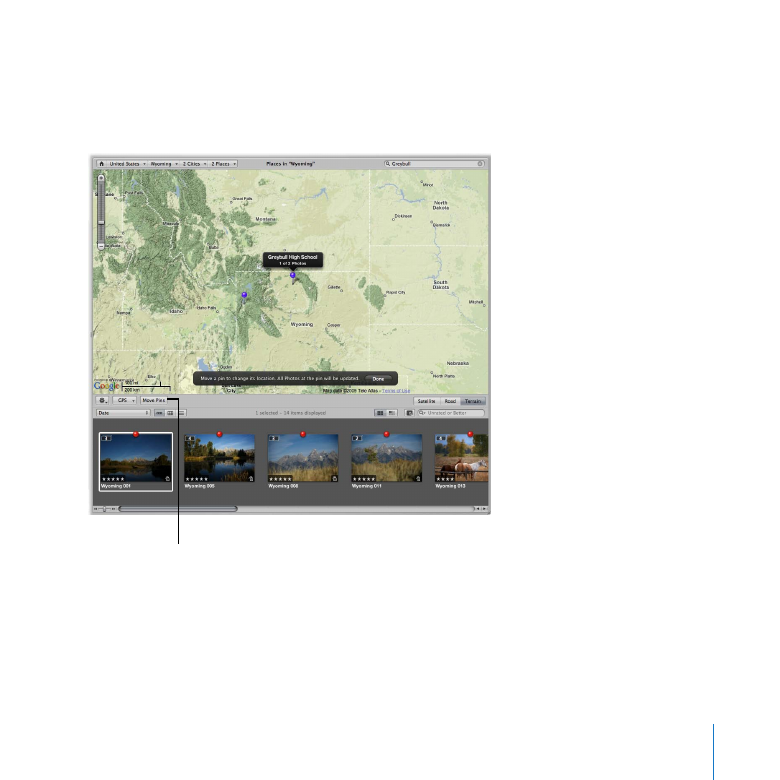
Manually assign a location to selected images
In the Library inspector, select the image or images to which you want to assign a
1
location. For now, select the Wyoming 036 bison image in the Wyoming project in the
Wildlife folder.
Adjust the map view to display the location you want. For now, simply zoom in to any
2
location in Wyoming.
Drag the Wyoming 036 image from the Browser to that location on the map.
3
A location label appears above a purple pin, marking the location assigned to the image.
Click Done.
4
Chapter 5
Exploring Places
89
Move a location pin, changing the location of all the associated images
In Places view, click the Move Pins button.
1
The location pins turn purple, indicating that they can be moved.
Move Pins button
Drag a pin to a different location, then click Done in the dialog that appears at the
2
bottom of Places view.

90
Chapter 5
Exploring Places
Quickly assign a location to all versions in a project
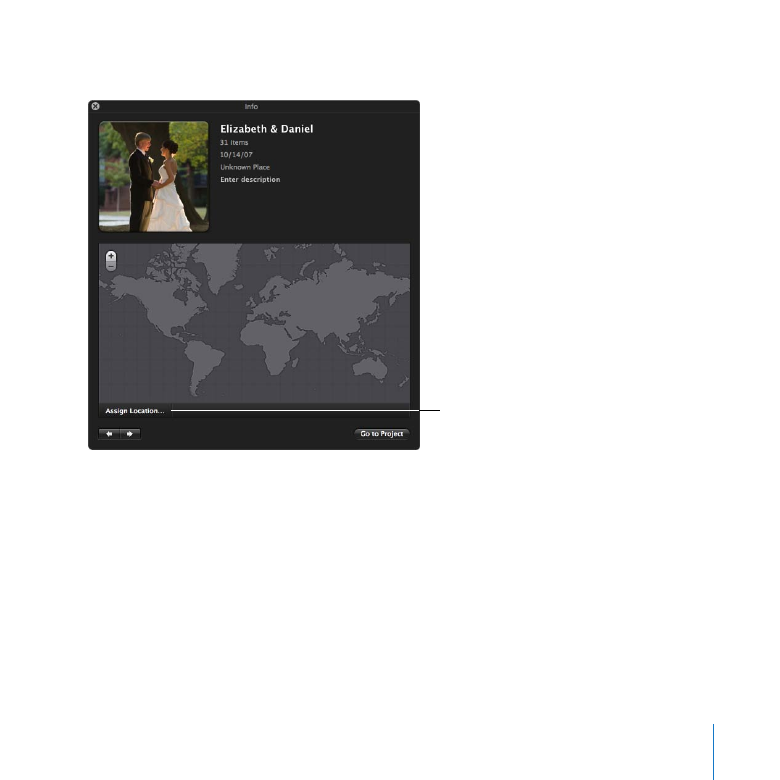
In the Library inspector, select Projects.
1
Select the Elizabeth & Daniel project.
2
Click the Info button on the project.
3
Info button
The Info HUD appears.
Chapter 5
Exploring Places
91
In the Info HUD, click the Assign Location button.
4
Assign Location button
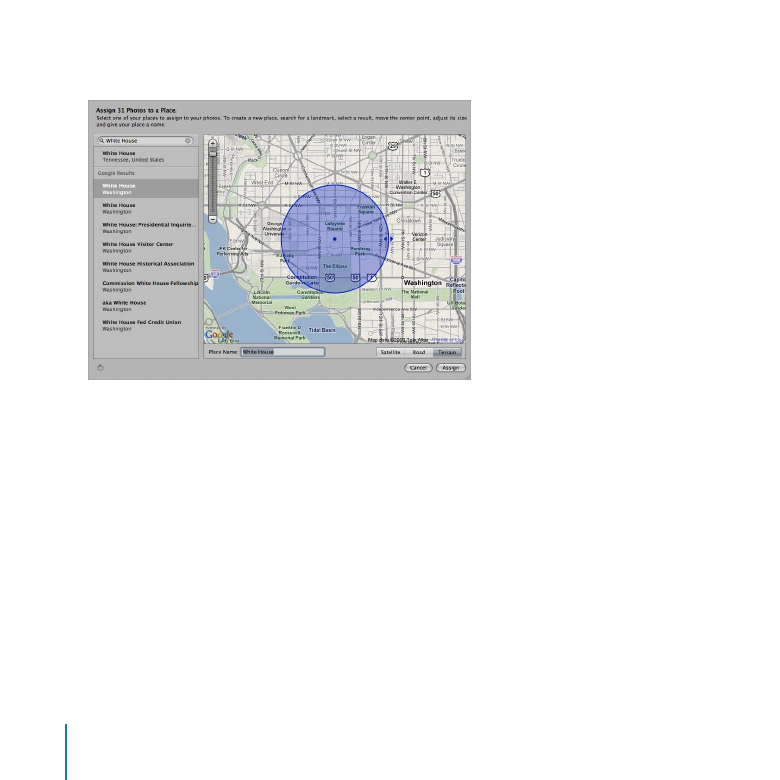
In the dialog that appears, enter “White House” in the search field.
5
You can enter a specific address or the name of a city, a town, or a significant
geographical location such as a national park.
92
Chapter 5
Exploring Places
Select White House, Washington in the search results, then click Assign.
6
Click the close button in the Info HUD.
7