Naming Faces
Aperture automatically detects the faces in your images. You can then identify faces by
selecting an image and assigning a name to the subject using the Name mode.
Face label
Aperture places a face label below a person’s face, and you can enter the person’s
name. When you position the pointer over a face, a positioning box appears, framing
the face.

Chapter 4
Exploring Faces
69
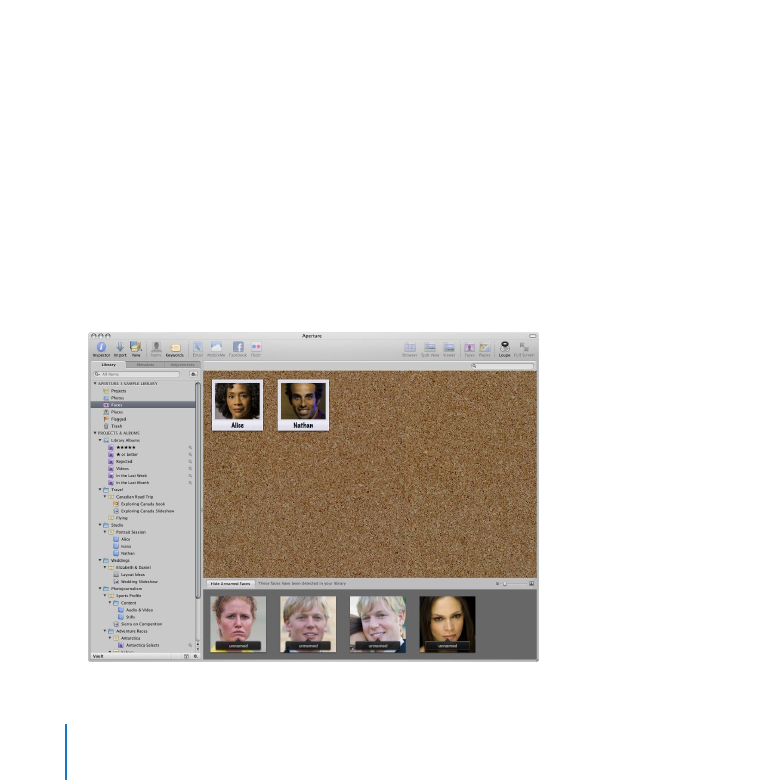
Once you’ve named a person in one of your images, Aperture can present other
suggested images of that person in the library.
You can view suggested images of that person as well as confirmed images by
selecting Faces in the Library inspector. The main window switches to Faces view. To
show the confirmed and unnamed faces for any person, double-click the person’s
snapshot in Faces view.
Confirmed faces
Faces to be named
70
Chapter 4
Exploring Faces
Getting Ready
Click the Library tab to display the Library inspector.
1
Click the Split View button in the toolbar to switch to the Split View layout.
2
Try This
View all the images that have a name assigned
In the Library inspector, select Faces.
m
The main window switches to Faces view, showing snapshots of all the people you’ve
named in the Aperture library.
The images you see on your screen may be different from those shown here.
Note:

Chapter 4
Exploring Faces
71
Faces that have not yet been named appear at the bottom of Faces view. You can
assign names to the faces if you want.
Assign a name to a face in Faces view
In Faces view, click the Show Unnamed Faces button.
1
Click the face label in the unnamed face image shown below.
2
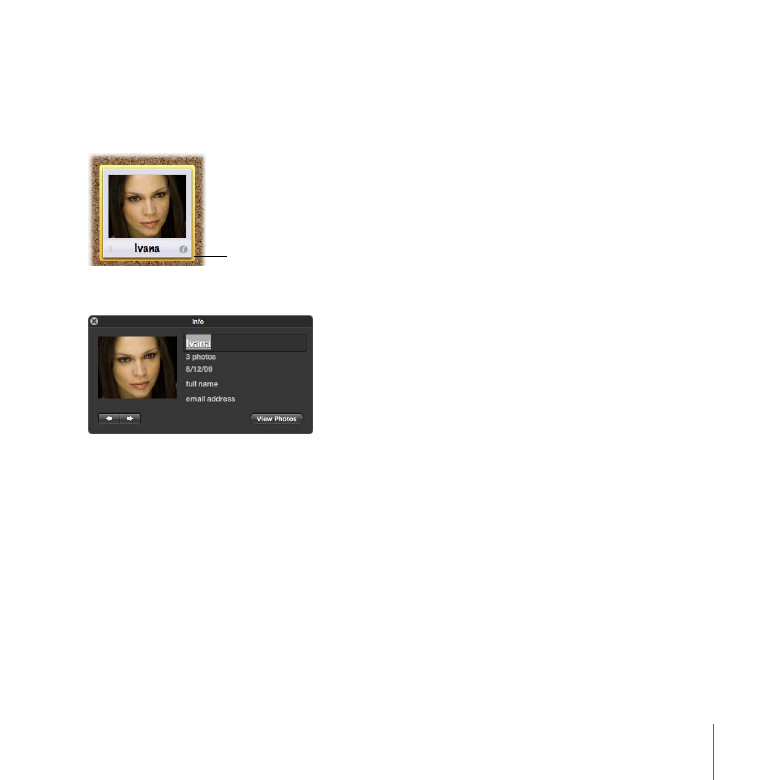
Enter a name here.
Enter the name “Ivana” and press Return. A snapshot for the newly named person
3
appears at the top of Faces view.
72
Chapter 4
Exploring Faces
Review the images of a particular person
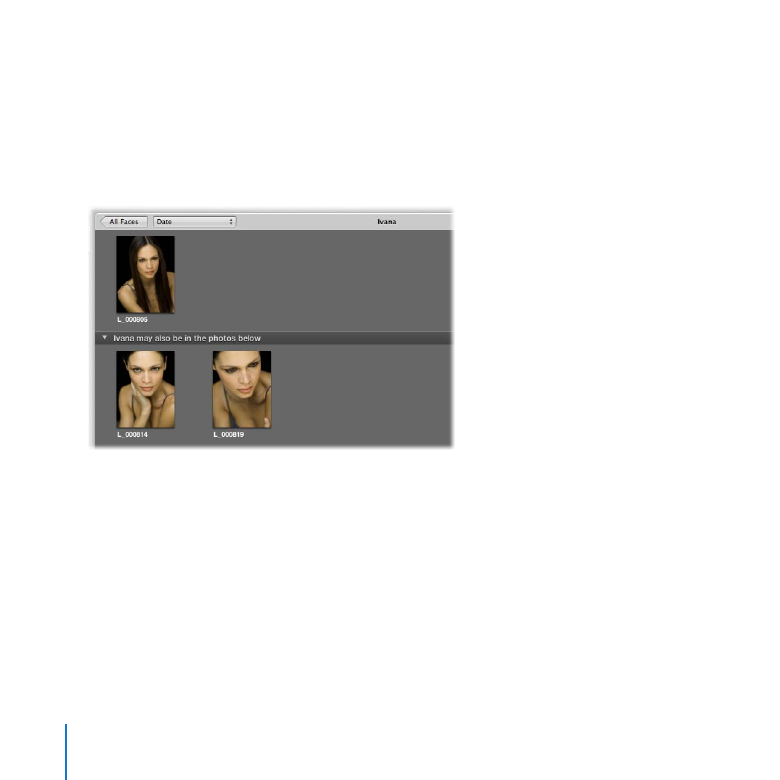
In Faces view, double-click the Ivana snapshot.
1
The Faces browser appears, showing all the images containing Ivana. In the bottom half
of the Faces browser, Aperture displays all the suggested images of Ivana.
The images you see on your screen may be different from those shown here.
Note:
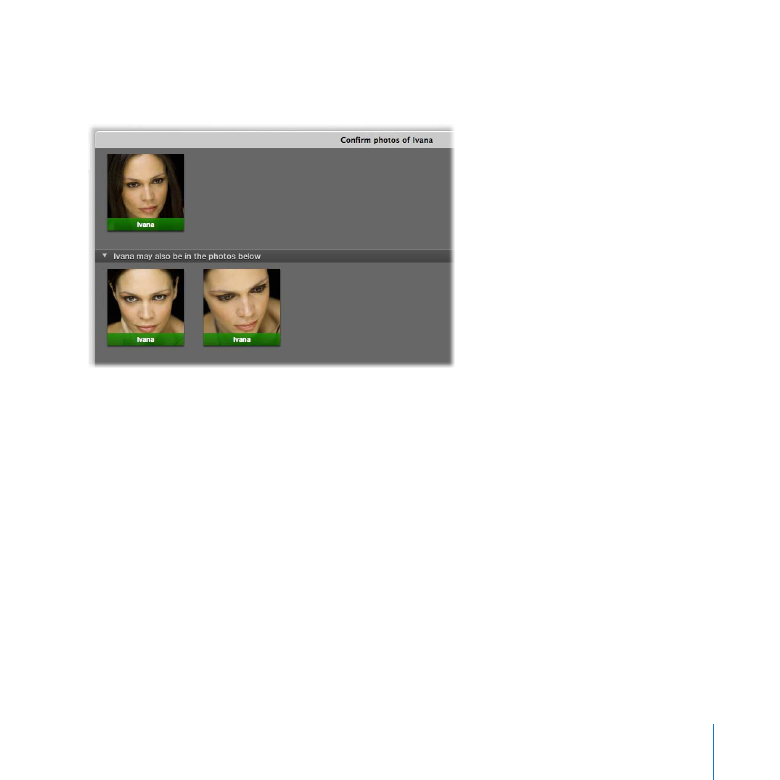
At the bottom of the Faces browser, click the Confirm Faces button.
2
Chapter 4
Exploring Faces
73
To confirm that the correct person appears in an image, click the image. Click an image
3
twice to indicate that this image is not of the suggested person.
When you have finished confirming images, click Done.
4

74
Chapter 4
Exploring Faces
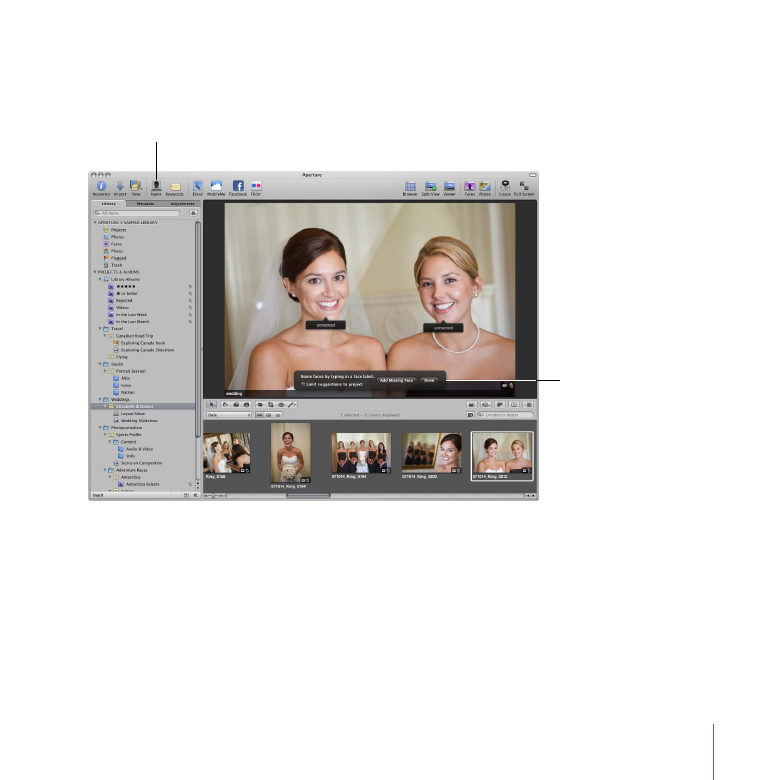
Assign a name to a face in a folder, project, or album
In the Library inspector, select the Elizabeth & Daniel project in the Weddings folder.
1
Select the 071014_King_0212 image in the Browser to assign it a name.
2
Select this image.
Chapter 4
Exploring Faces
75
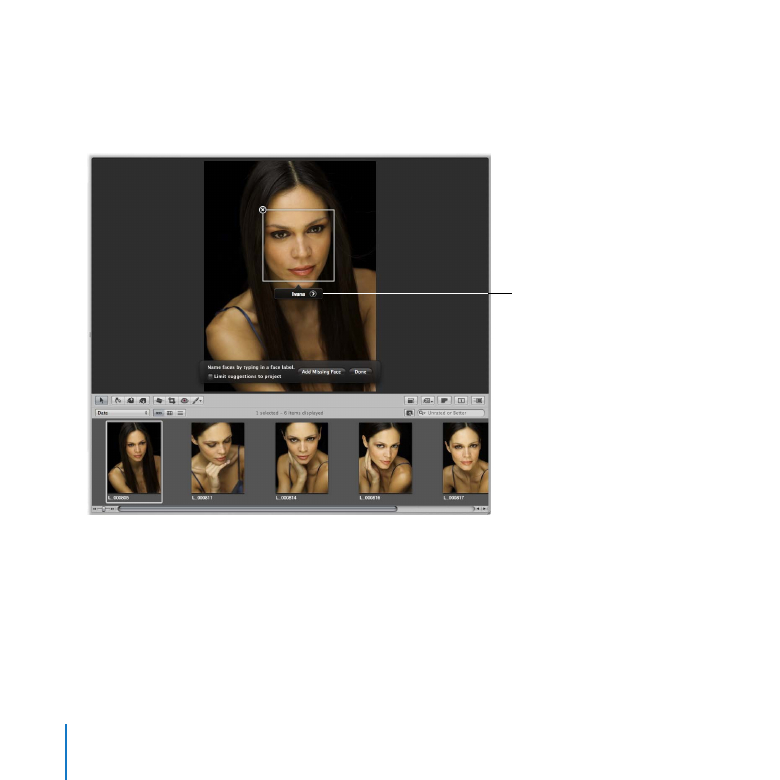
Click the Name button in the toolbar.
3
Aperture automatically places a face label below each face that it detects in the image.
Name button
Name Faces HUD
Click the bride’s face label on the left, enter the name “Elizabeth” in the text field, then
4
press Return.
Click Done in the Name Faces HUD.
5
76
Chapter 4
Exploring Faces
Click the Faces button in the toolbar (not the Faces item in the Library inspector).
6
The main window switches to Faces view, showing people identified in the images in
the selected folder, project, or album.
The images you see on your screen may be different from those shown here.
Note:
Faces button
Experiment with assigning names and confirming images of Elizabeth.
7
Chapter 4
Exploring Faces
77
Add more information about a person
Select Faces in the Library inspector.
1
Position the pointer over a person’s snapshot, then click the Info button that appears.
2
Info button
The Info HUD appears.
In the Info HUD, enter a full name and email address for the person, if you wish. You
3
can enter a person’s Facebook email address, and the person will receive notification
automatically when you use Aperture to publish the image to Facebook. You can also
change the name associated with the face.
Click the close button to close the Info HUD.
4

78
Chapter 4
Exploring Faces